Guides

Graphics & HUD settings

Two quick changes that make the city run smoother: put the HUD in Performance Mode, then match the game’s graphics settings below.

1 Put the HUD in Performance Mode

In game, type /settings in chat. On the General tab, set Performance Mode to Performance Mode. Your choice saves automatically.
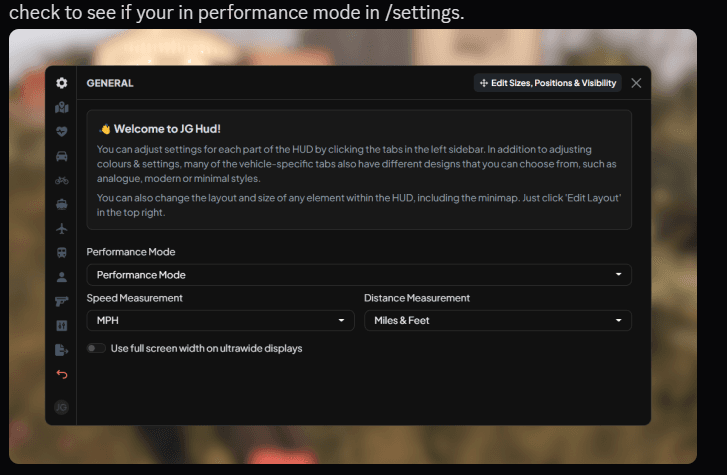
The HUD settings window with Performance Mode selected

2 Match the graphics settings

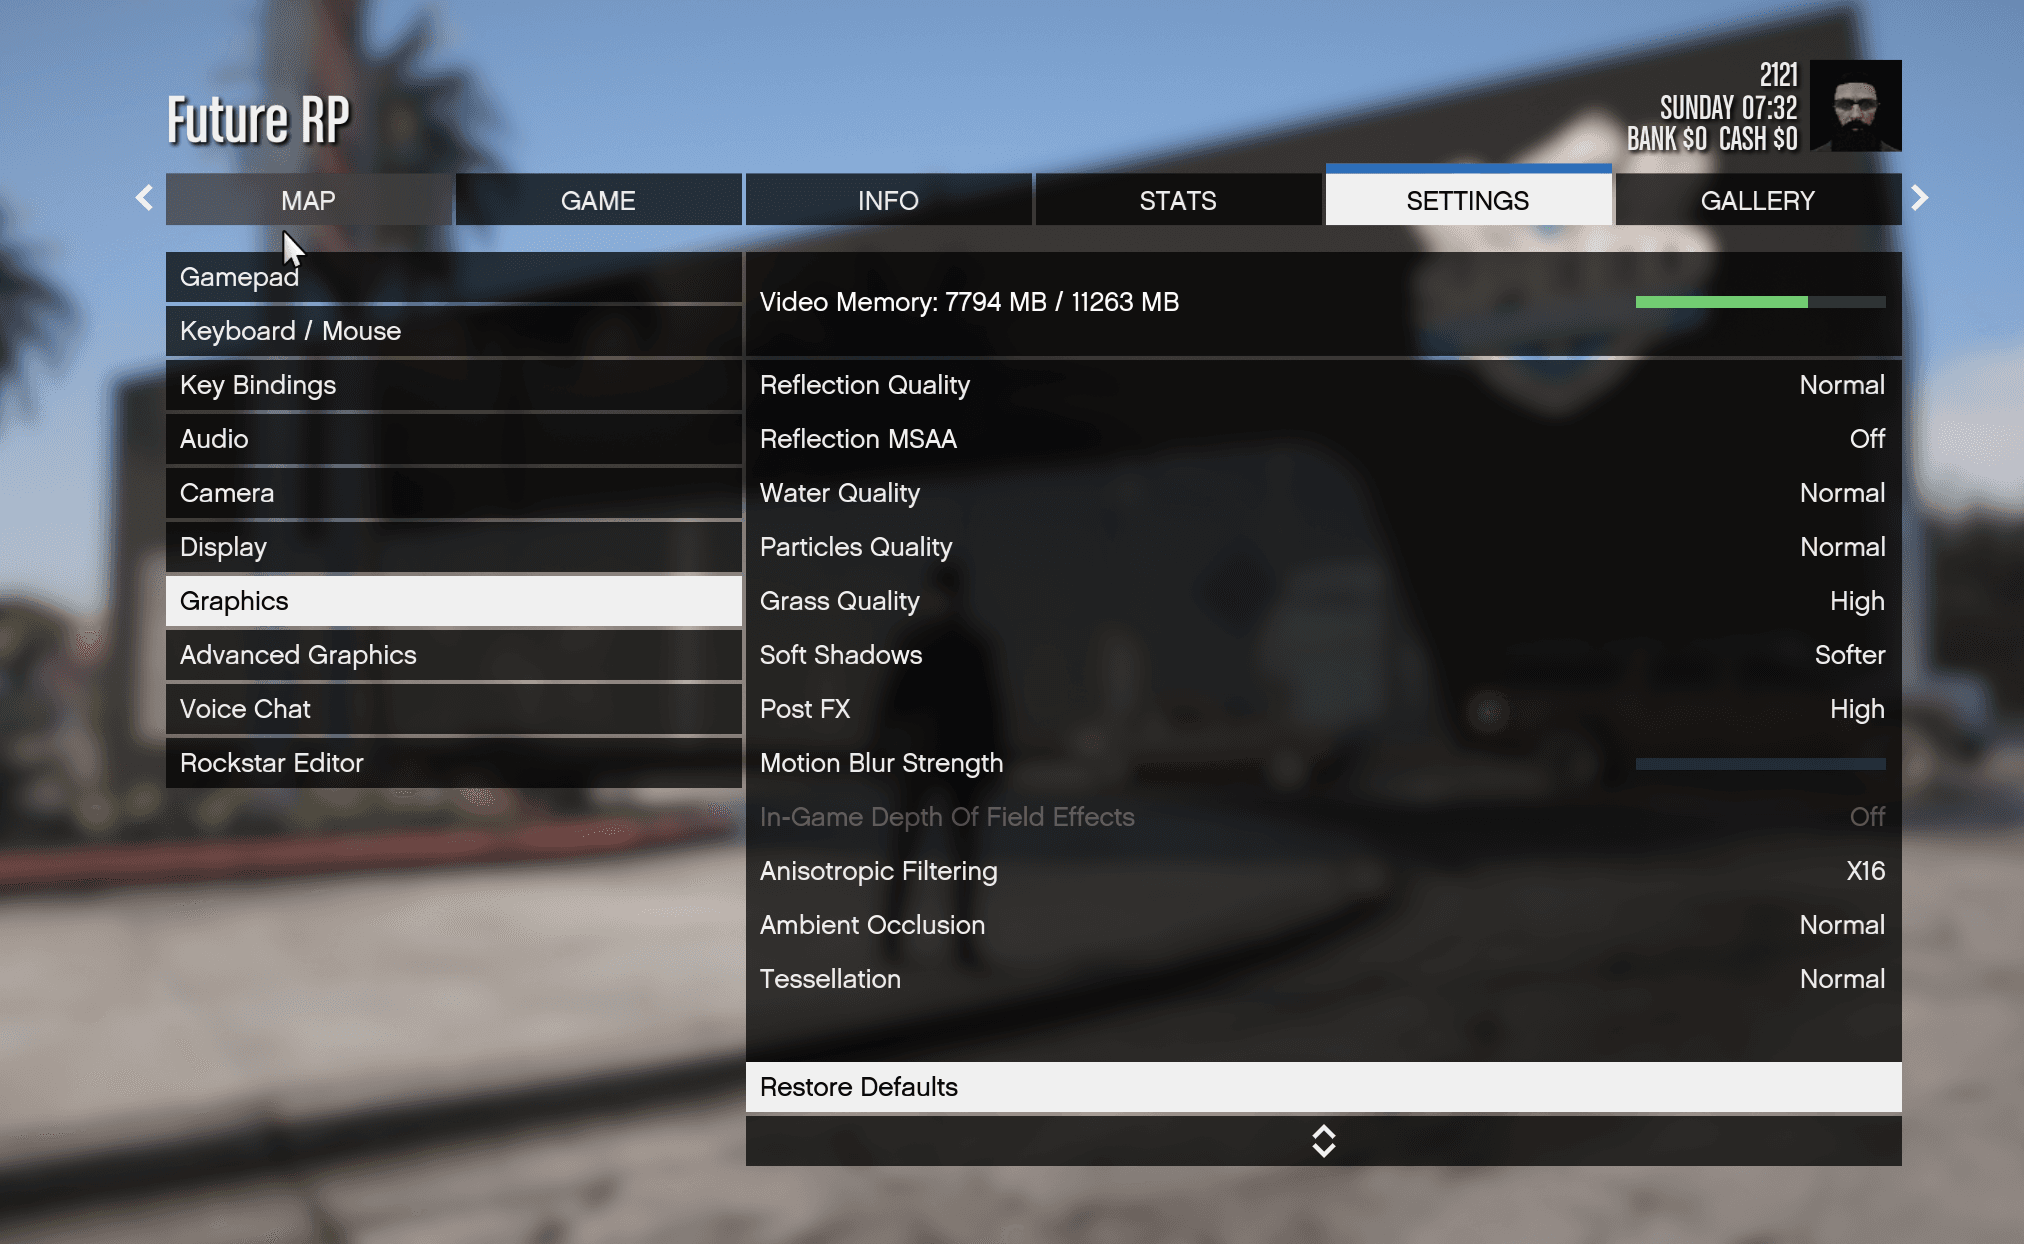
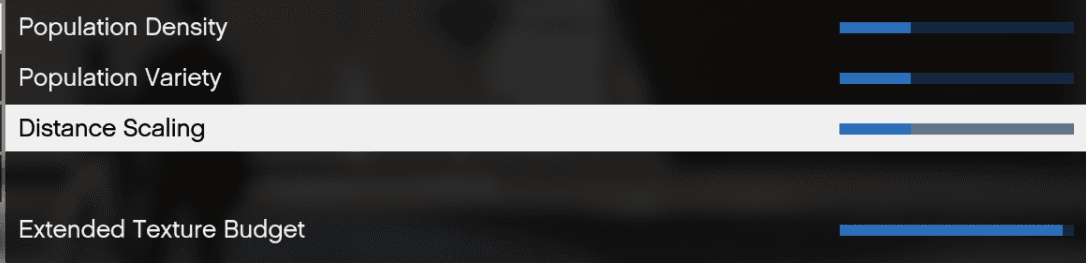
Press Esc, then go to Settings › Graphics and set each line as shown. The three sliders that matter most are Population Density, Population Variety and Distance Scaling: keep them low.

NVIDIA TXAA
Off
VSync
Off
Pause Game On Focus Loss
Off
Population Density
Low (about a third)
Population Variety
Low (about a third)
Distance Scaling
Low (about a third)
Extended Texture Budget
Nearly full
Texture Quality
High
Shader Quality
High
Shadow Quality
High
Reflection Quality
Normal
Reflection MSAA
Off
Water Quality
Normal
Particles Quality
Normal
Grass Quality
High
Soft Shadows
Softer
Post FX
High
Motion Blur Strength
None
Anisotropic Filtering
X16
Ambient Occlusion
Normal
Tessellation
Normal

These are the settings from our own setup. If your PC struggles, lower Texture, Shader and Shadow Quality first.
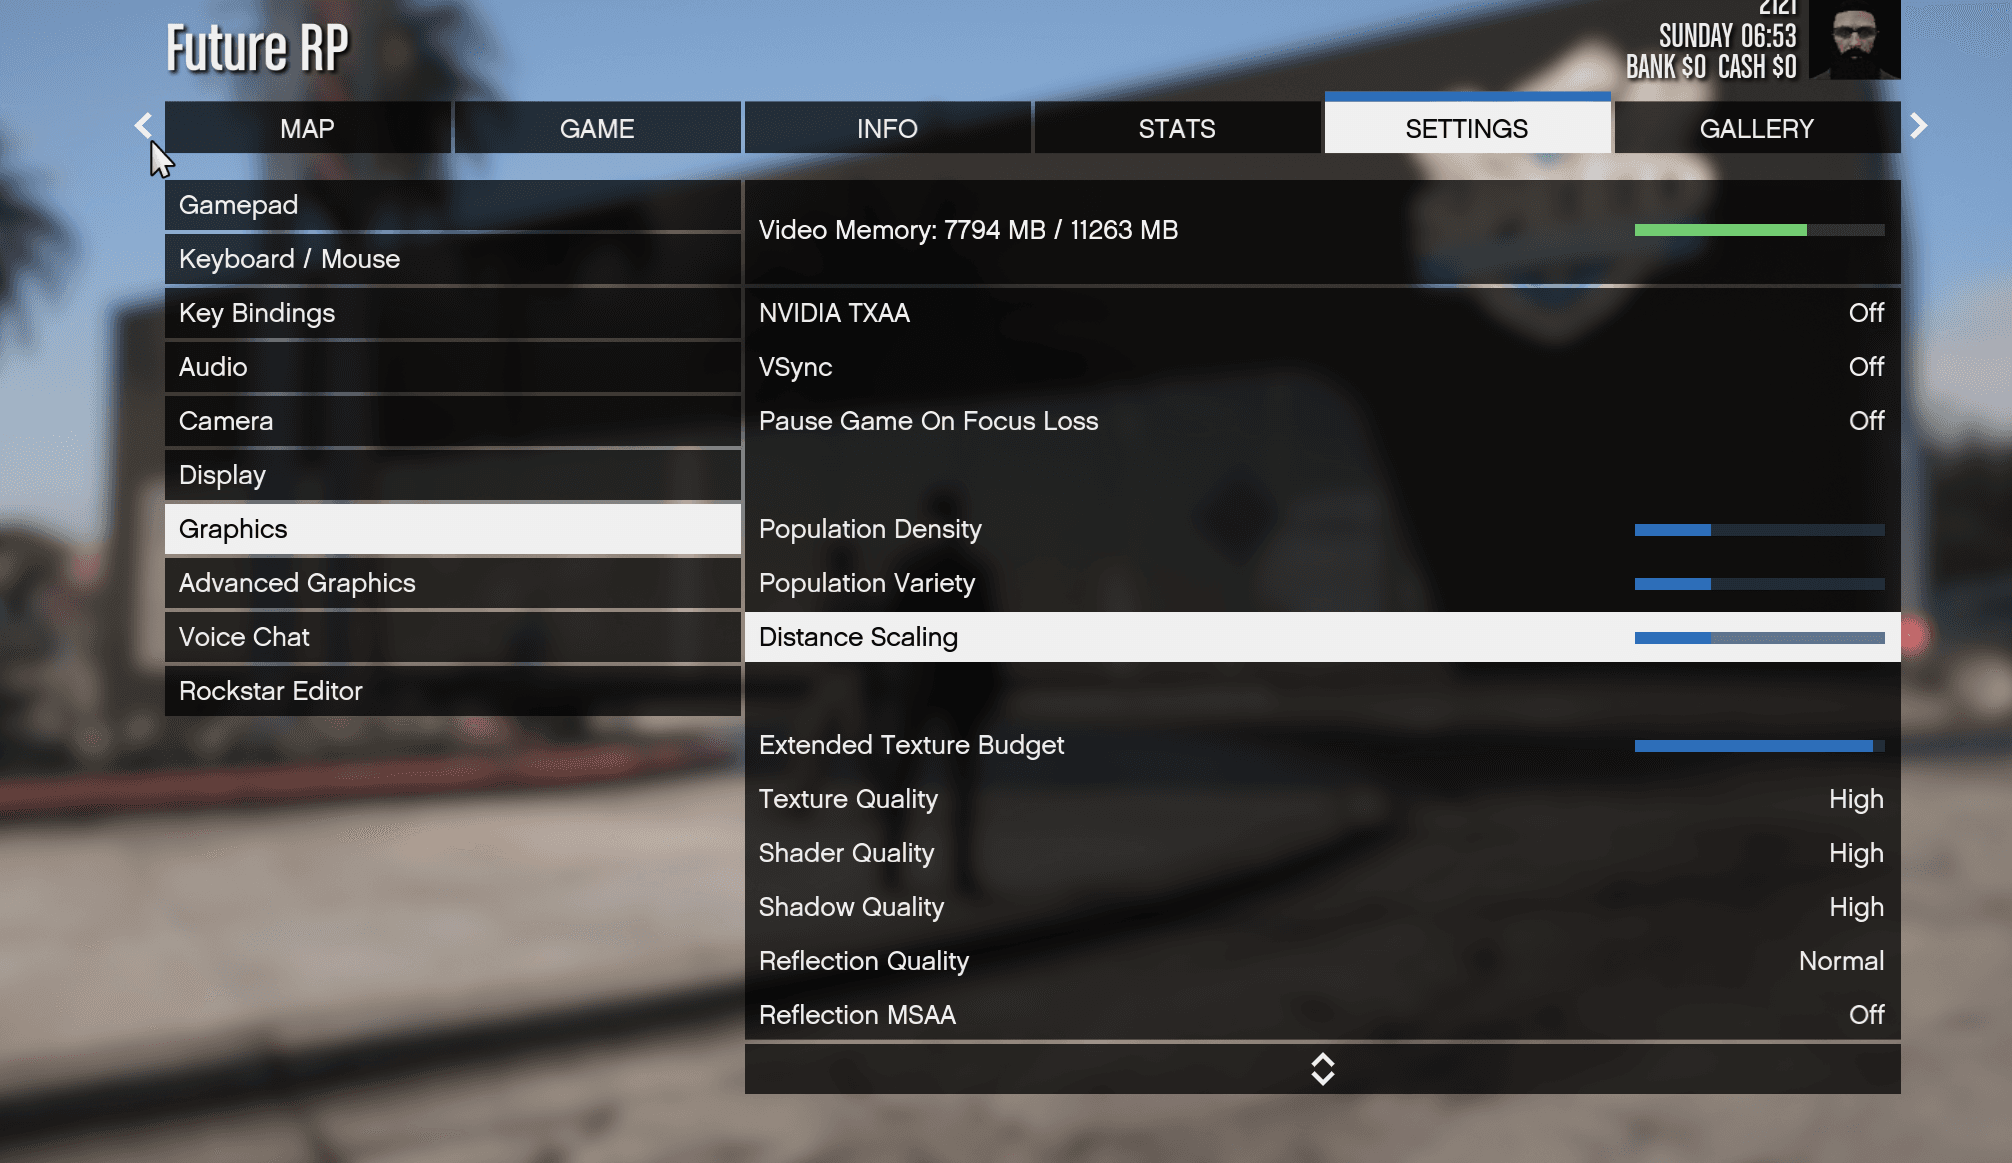
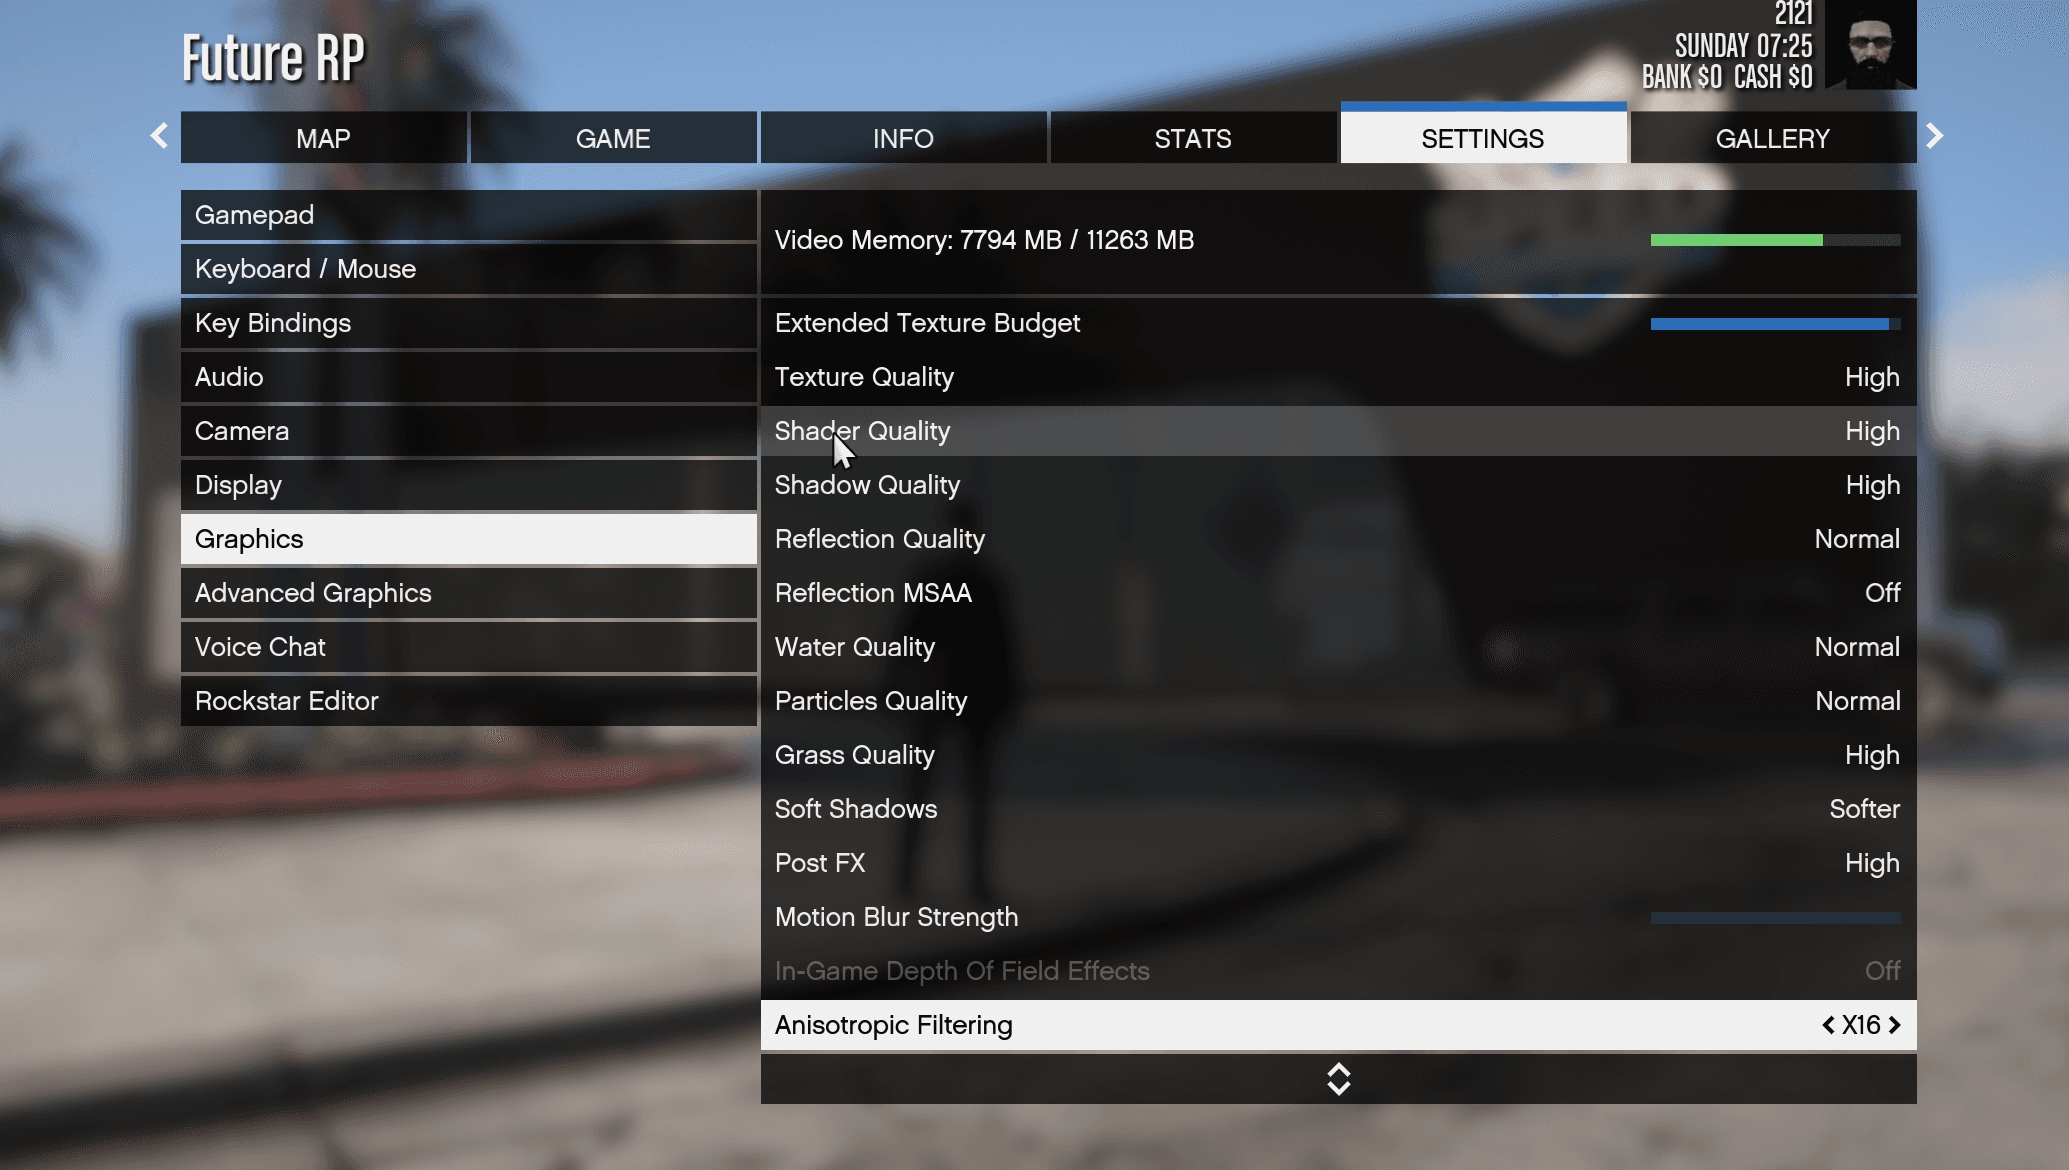
GTA graphics settings, top of the list
GTA graphics settings, middle of the list
GTA graphics settings, bottom of the list
Close-up of the Population Density, Population Variety and Distance Scaling sliders set low
The three sliders to keep low, with Extended Texture Budget nearly full.

3 Make the HUD yours

The same /settings menu lets you change colours, resize the minimap, pick analogue, modern or minimal styles, and hide what you don’t need. Use Edit Sizes, Positions & Visibility to move things around.
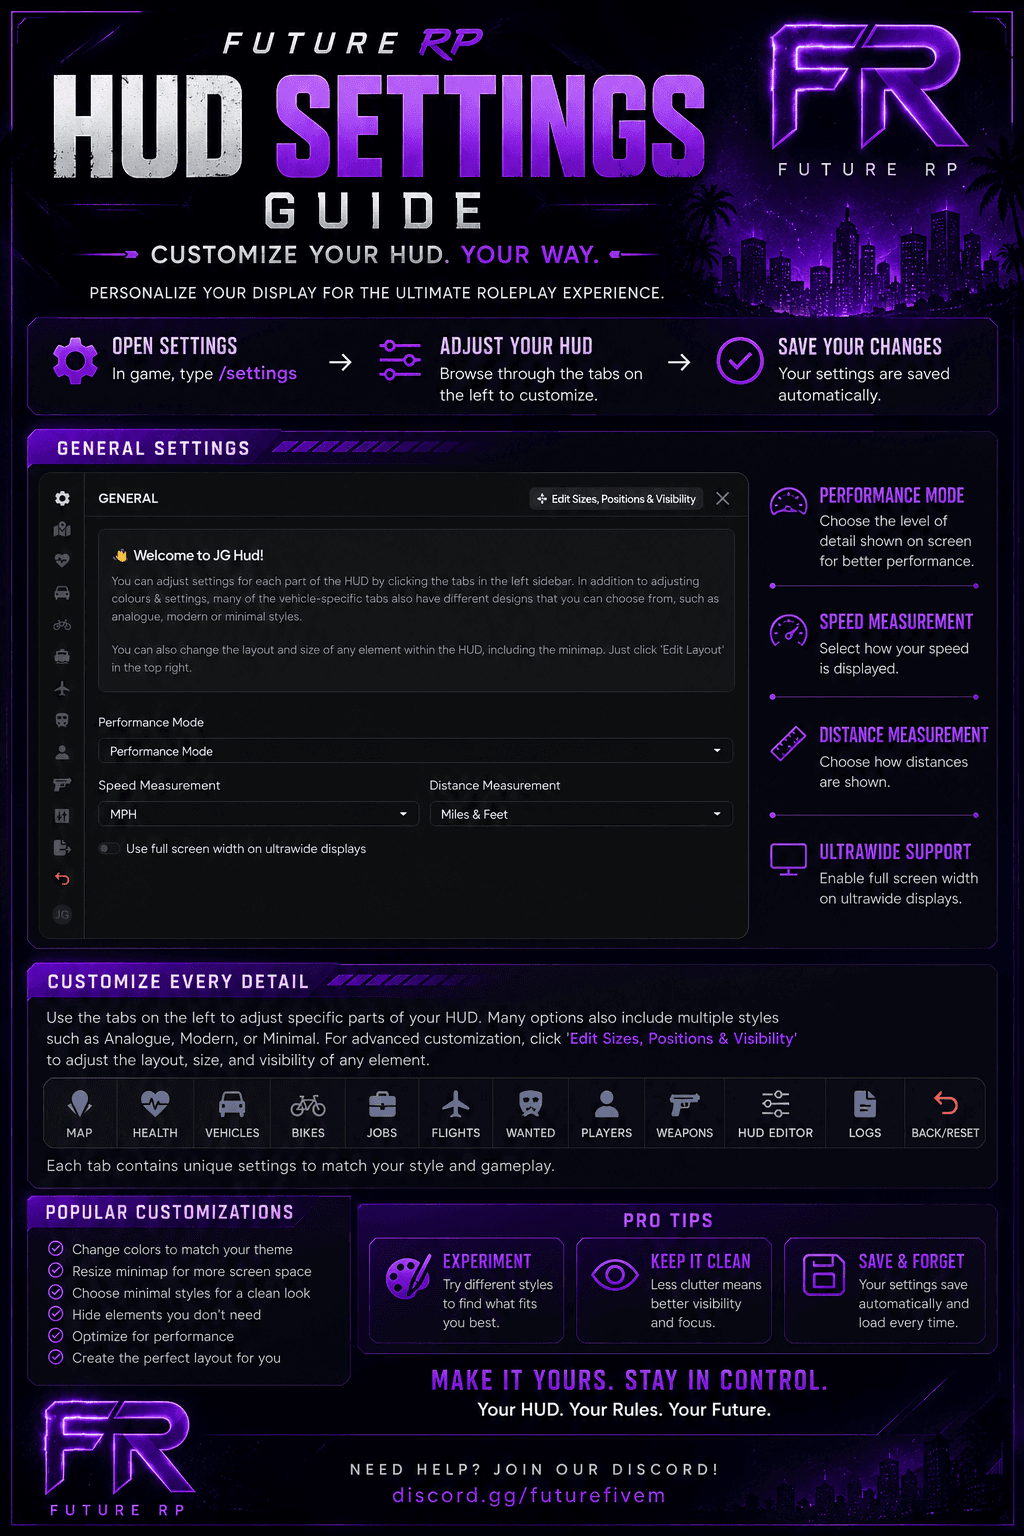
Future RP HUD Settings Guide poster: open settings with /settings, adjust your HUD with the tabs on the left, changes save automatically